

Post by Keith Tanaka on Dec 2, 2013 20:20:48 GMT -8
Gonzo (Hector Gonzalez) has been scratchbuilding the front end of his hardbody chassis cars and wanted to show me how its done.
The following photos show the step by step procedure to make your own front end (guide flag holder).
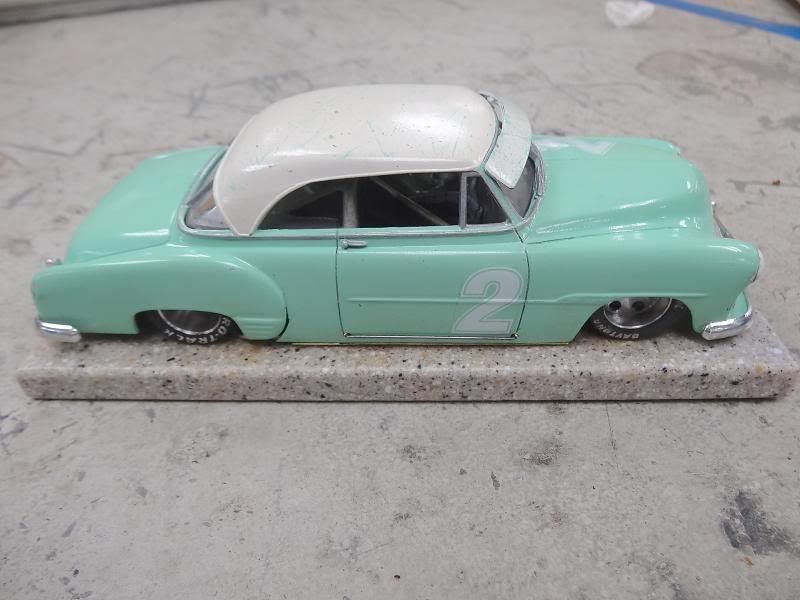
Gonzo's '51 Chevy lowrider is one fast hardbody
The secret to a fast car is a good handling chassis/car. Hector built this new chassis recently.
Today, we'll take a look at how he builds the front end of this chassis.
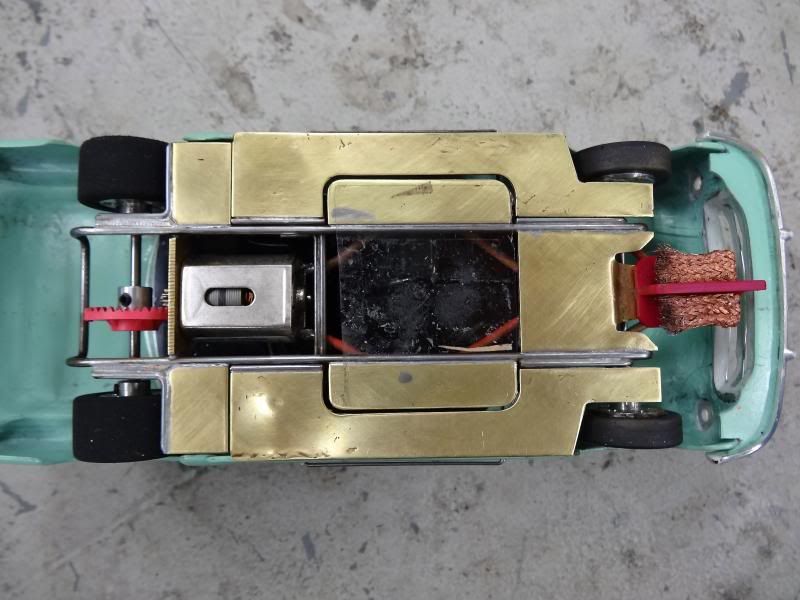
Here's what the finished front end piece looks like.

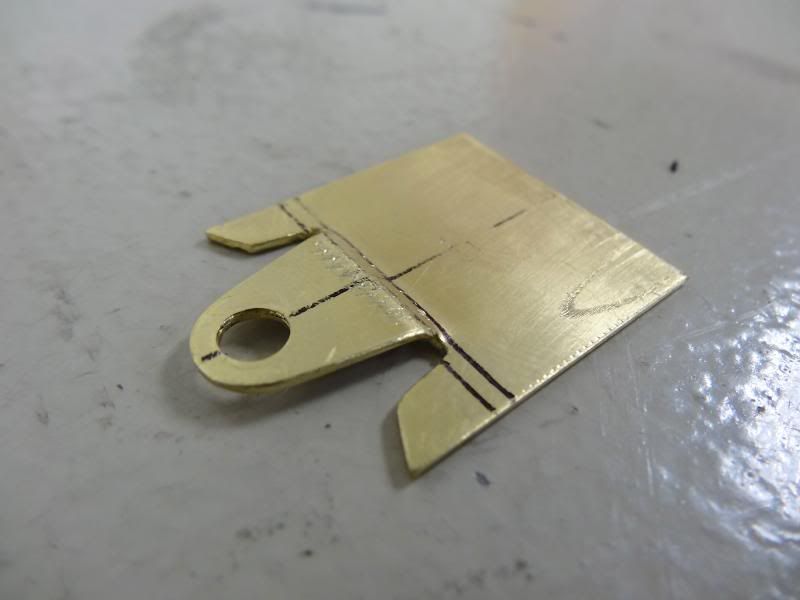
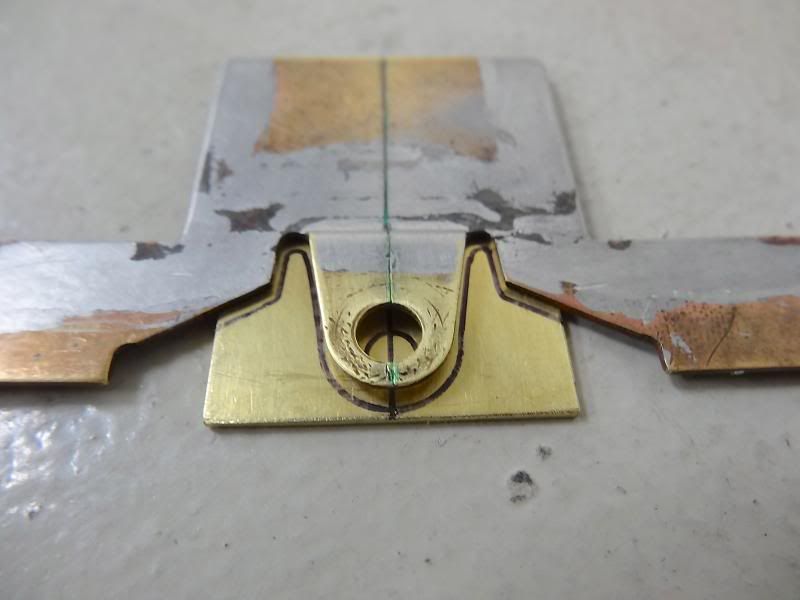
This photo shows the various steps needed to build this front end. An old front end from another era is used as a guide to copy.
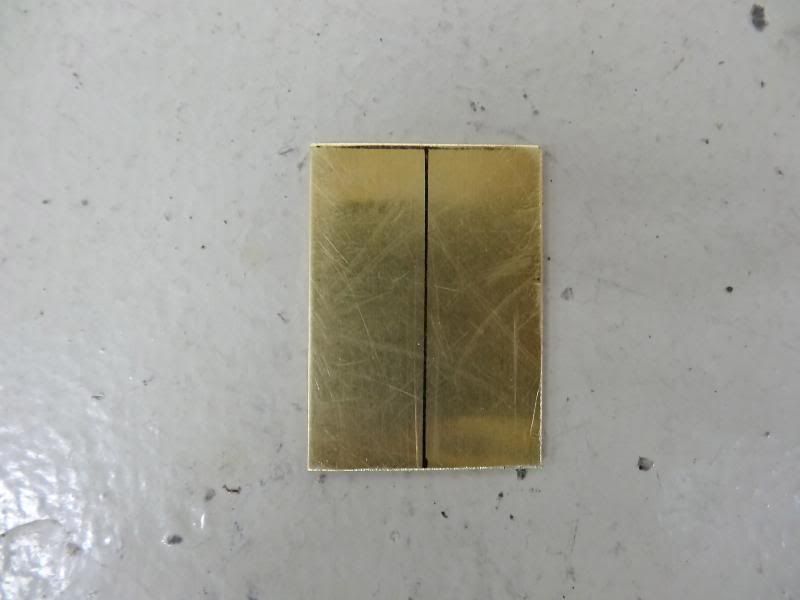
The first step is to take a piece of brass sheet 1.00" wide (or whatever width you choose) and draw a line down the center. Gonzo uses .040" thick brass plate for this piece. .040" brass is available from K&S (must be ordered). You can also use 1/32" thick brass or whatever thickness you prefer. Note: since this will be used on a hardbody car, there's no need for a thick/stronger front end as required for cars using lexan bodies. The hardbody styrene body protects the guide flag from being bent during a hard crash whereas a lexan bodied car requires a stronger front end (1/16" thick brass or steel reinforcement piece).
The old front end is used as a guide to draw the front end on the brass piece using a fine point felt pen (or line scriber).
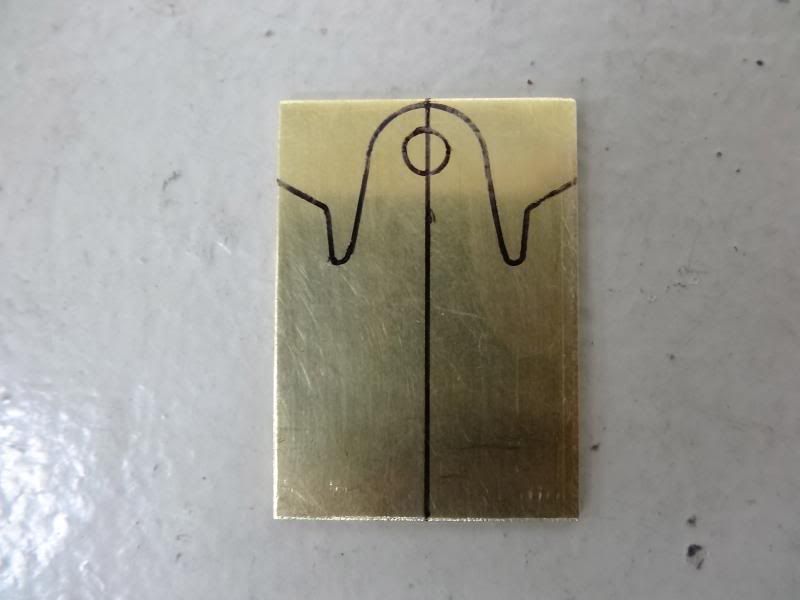
Here's what this piece looks like after copying the outline of the front end.
Using a center punch, mark the location of the guide flag hole. Use a drill to make the guide flag hole. A step drill (Unibit) makes this task easier.
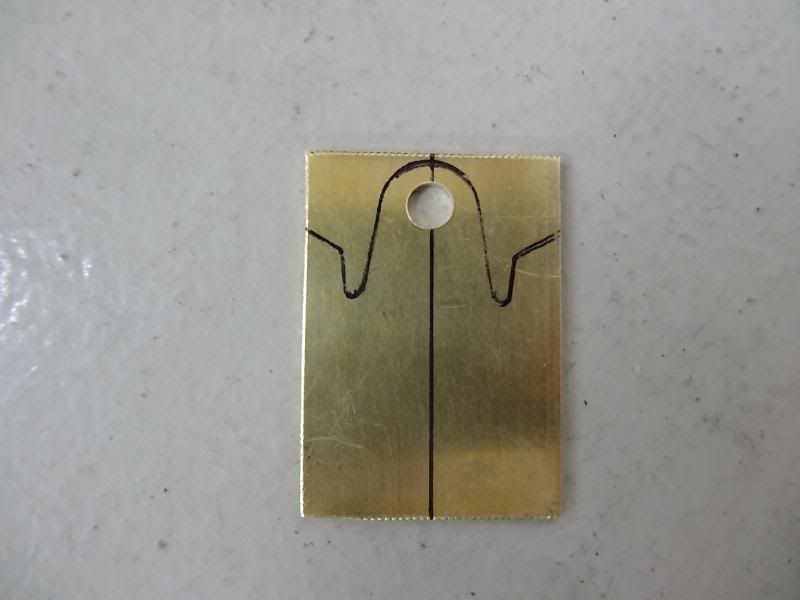
Drill a 3/16" hole for the guide flag. Remove the excess brass by using a "Nibbler" tool and a dremel tool.

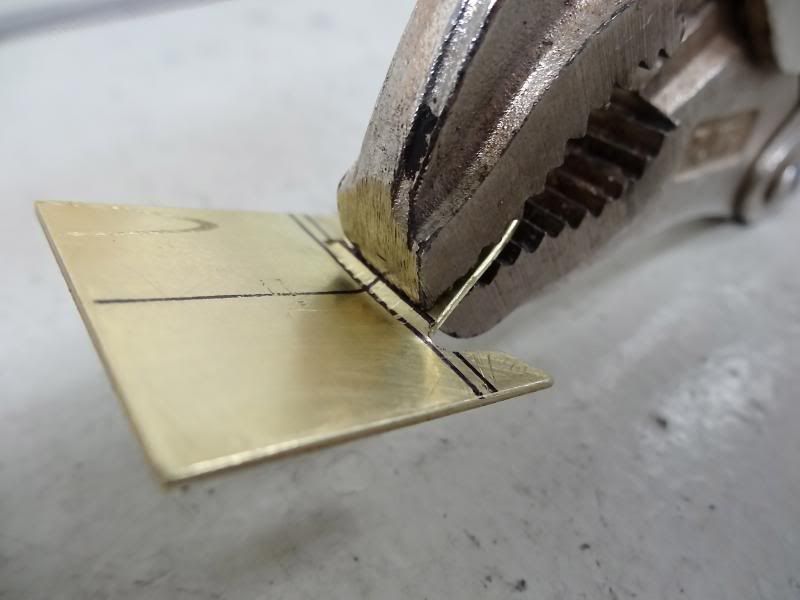
Mark two horizontal lines. The first line is .375" from the guide flag center. The second line is another 1/16" or 3/32". This dimension will provide the proper height of the guide flag.
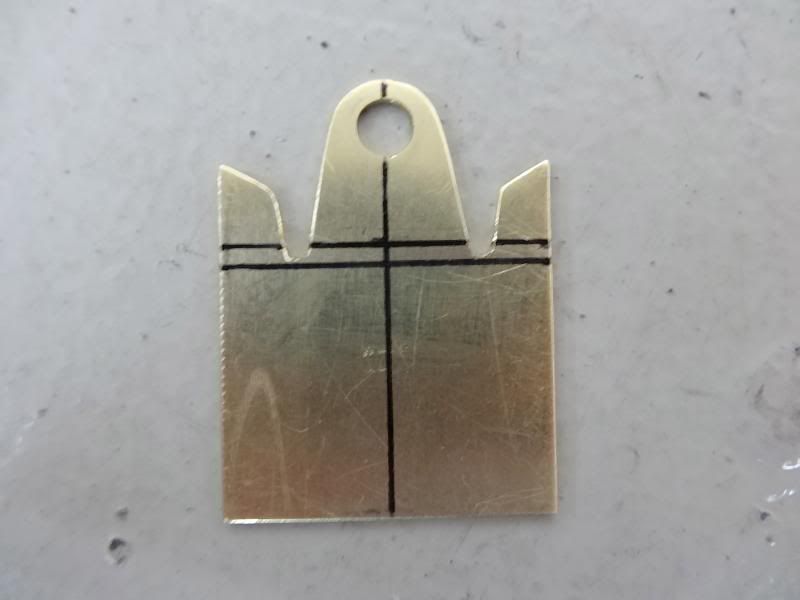
Here's what it looks like after adding the lines. It's important that the depth of the two side cuts reaches the 2nd horizontal line. This makes it easier to make the necessary bending of the brass plate.
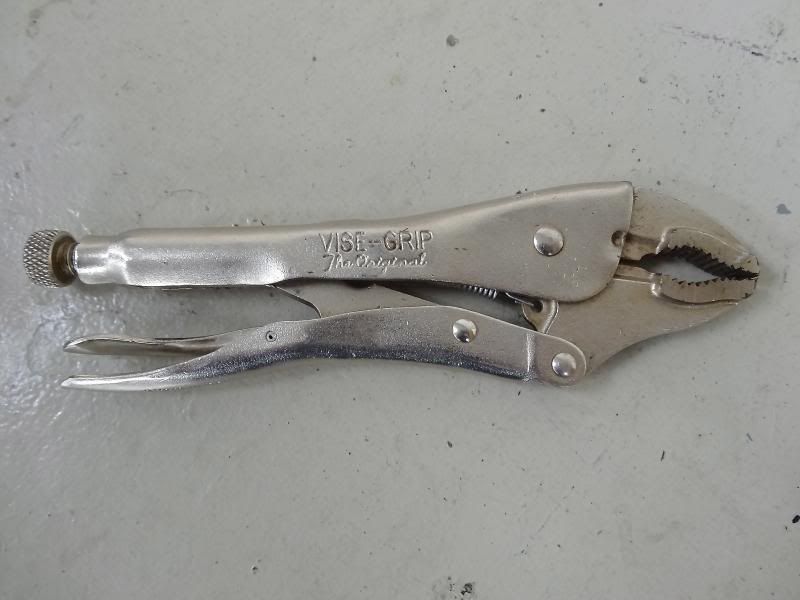
The next step is make some bends along the horizontal lines. Using a locking plier (Vise-Grip) such as this one makes bending brass much easier.
Locate the locking pliers along the second line (furthest from the guide flag center). Be sure to lock pliers when you find the right location.

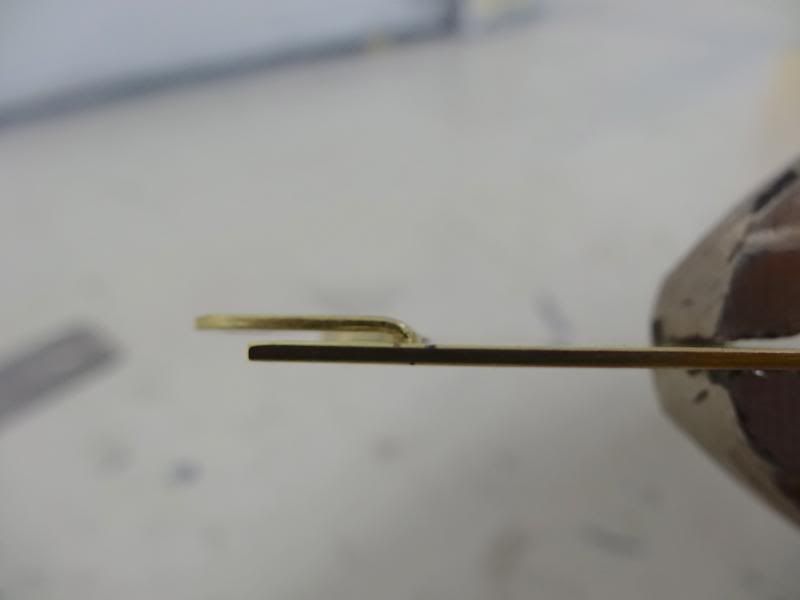
Bend the brass approx. 45 degrees (doesn't have to be accurate).
Here's how it looks after the first bend.
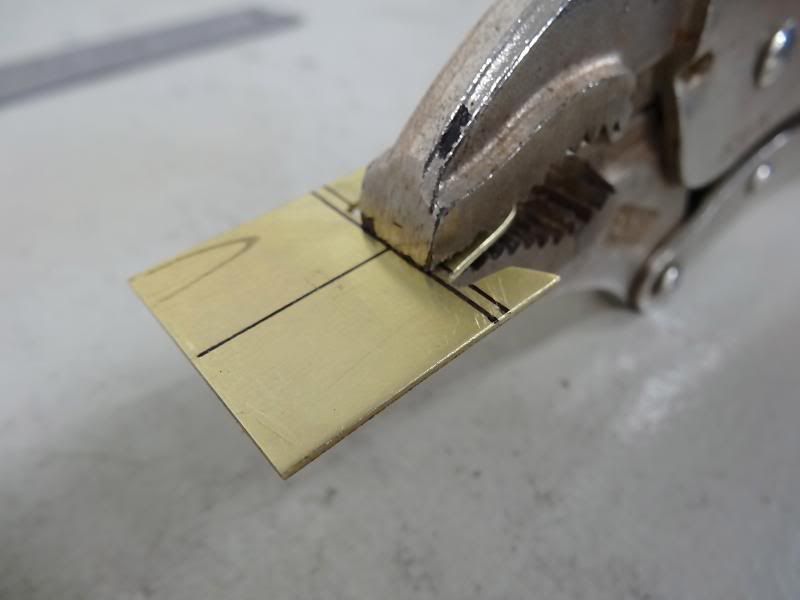
Locate the locking pliers on the second line (1/16" or 3/32" from the first bend line), lock pliers.
The second bend is parallel to the brass plate.
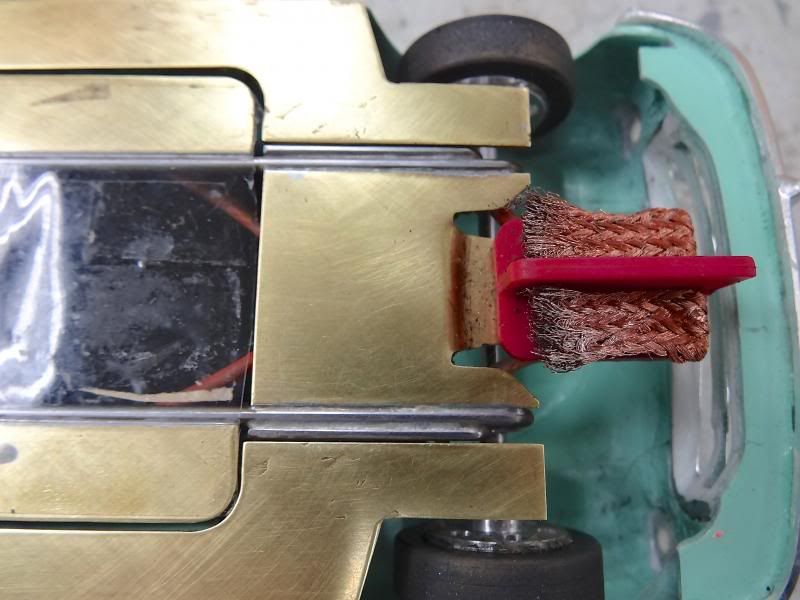
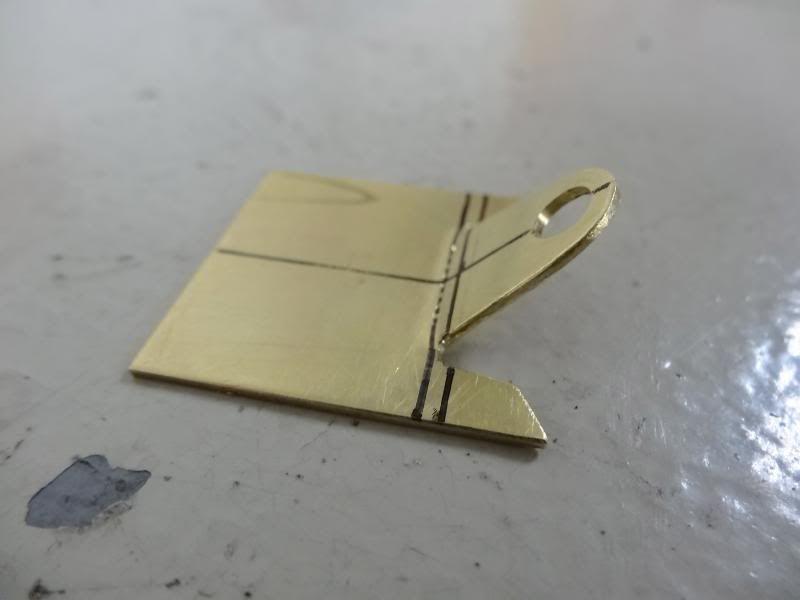
Here's the finished front end piece. Be sure the guide flag fits properly and turns easily when in place.
You may need to file the guide flag hole slightly to allow easy movement of the guide flag.
A reamer tool is perfect for enlarging holes slightly.
Thanks to Hector for providing the step by step demo on how he builds his own front end piece.
He made it look easy, but I'm sure it will take some practice to make it just right.
Give it a try. It's a very satisfying feeling when you can build something custom.
Keith
The following photos show the step by step procedure to make your own front end (guide flag holder).
Gonzo's '51 Chevy lowrider is one fast hardbody
The secret to a fast car is a good handling chassis/car. Hector built this new chassis recently.
Today, we'll take a look at how he builds the front end of this chassis.
Here's what the finished front end piece looks like.
This photo shows the various steps needed to build this front end. An old front end from another era is used as a guide to copy.
The first step is to take a piece of brass sheet 1.00" wide (or whatever width you choose) and draw a line down the center. Gonzo uses .040" thick brass plate for this piece. .040" brass is available from K&S (must be ordered). You can also use 1/32" thick brass or whatever thickness you prefer. Note: since this will be used on a hardbody car, there's no need for a thick/stronger front end as required for cars using lexan bodies. The hardbody styrene body protects the guide flag from being bent during a hard crash whereas a lexan bodied car requires a stronger front end (1/16" thick brass or steel reinforcement piece).
The old front end is used as a guide to draw the front end on the brass piece using a fine point felt pen (or line scriber).
Here's what this piece looks like after copying the outline of the front end.
Using a center punch, mark the location of the guide flag hole. Use a drill to make the guide flag hole. A step drill (Unibit) makes this task easier.
Drill a 3/16" hole for the guide flag. Remove the excess brass by using a "Nibbler" tool and a dremel tool.
Mark two horizontal lines. The first line is .375" from the guide flag center. The second line is another 1/16" or 3/32". This dimension will provide the proper height of the guide flag.
Here's what it looks like after adding the lines. It's important that the depth of the two side cuts reaches the 2nd horizontal line. This makes it easier to make the necessary bending of the brass plate.
The next step is make some bends along the horizontal lines. Using a locking plier (Vise-Grip) such as this one makes bending brass much easier.
Locate the locking pliers along the second line (furthest from the guide flag center). Be sure to lock pliers when you find the right location.
Bend the brass approx. 45 degrees (doesn't have to be accurate).
Here's how it looks after the first bend.
Locate the locking pliers on the second line (1/16" or 3/32" from the first bend line), lock pliers.
The second bend is parallel to the brass plate.
Here's the finished front end piece. Be sure the guide flag fits properly and turns easily when in place.
You may need to file the guide flag hole slightly to allow easy movement of the guide flag.
A reamer tool is perfect for enlarging holes slightly.
Thanks to Hector for providing the step by step demo on how he builds his own front end piece.
He made it look easy, but I'm sure it will take some practice to make it just right.
Give it a try. It's a very satisfying feeling when you can build something custom.
Keith


