|
|
Post by brucewayne on Apr 29, 2013 16:22:24 GMT -8
One of the first things to consider when adapting a styrene model kit body to slot car use is to glue all the opening parts shut both for strength and durability. Also, if you want to widen or spread the body for tech or building purposes, you want all the openings such as doors, trunk lids and hoods securely glued shut before you begin the spreading process. Here for example is a '62 Chevy kit I plan on making for the post-war inline NASCAR class. I've marked the wheel well area to be cut out first. I used a Dremel with a cut-off wheel to make quick work of it. Note that I left the flange area intact where the hood glue is to glue down... 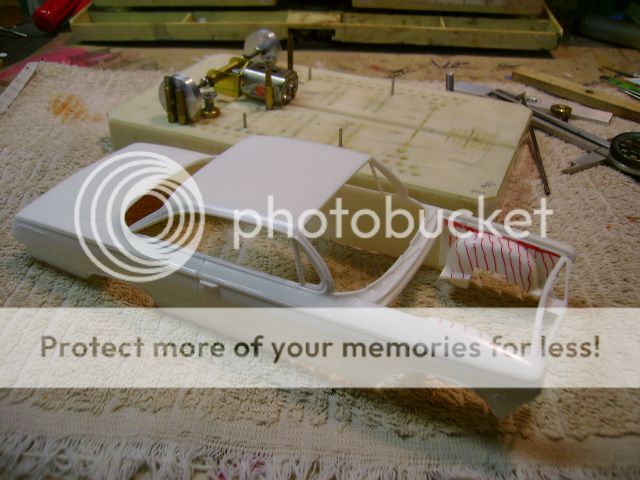 With the excess plastic cut away you can now plan how to glue on the hood. Since this model has a flange all around the hood, this will serve as a mounting base for the hood. If your model does not have a flange for the hood, you are well advised to make make your own from bulk .020" styrene strips (Edit: I will try to show that on another body soon)... 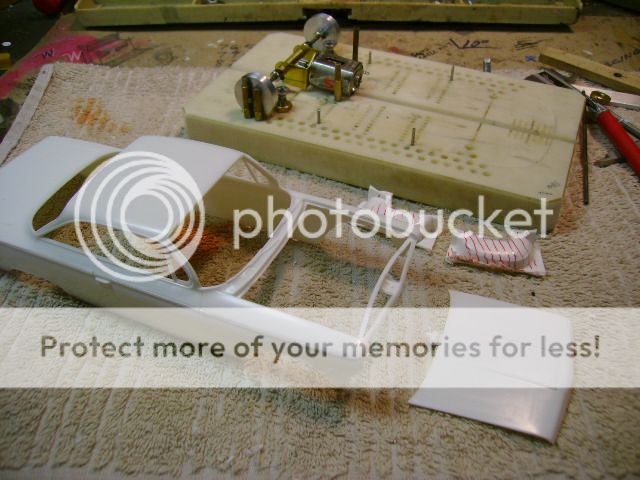 Here I'm showing the big feeder tab that a lot of kits use to attach the parts to the tree. If you simply try to break them off, you will most certainly leave a scar or divot needing repair. If you take the time to scribe the plastic about 1/2 way through before breaking them off, you will be left with a smooth clean cut requiring very little sanding to repair... 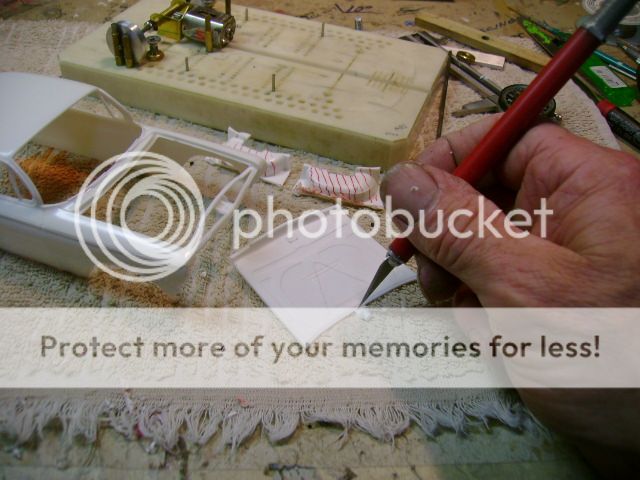 With the hood test fitted, it looks okay but sits a little low at all four corners. If you are not concerned with how well the body panels and gaps align, you can skip ahead to the glue up stages... 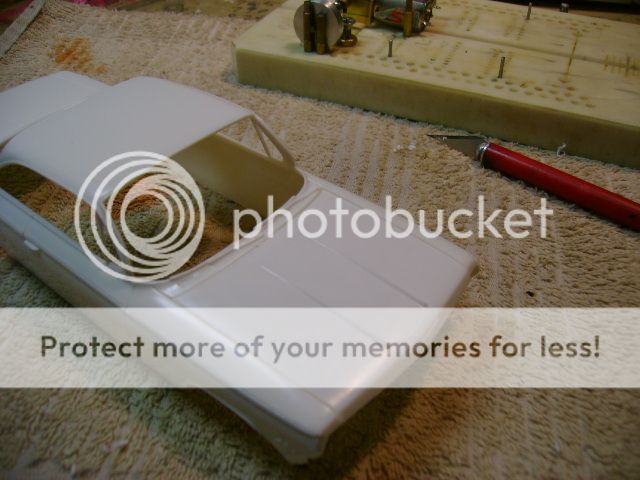 |
|
|
|
Post by brucewayne on Apr 29, 2013 16:43:49 GMT -8
Just like a 1:1 car, shims can be used to help adjust the parts so the gaps and panels fit within tolerance. Luckily all plastic model kits come with a plentiful supply of shim stock in the form of sprue trees. Pick one out that is long and smooth, and for best results scrap the mold seam off of it first... 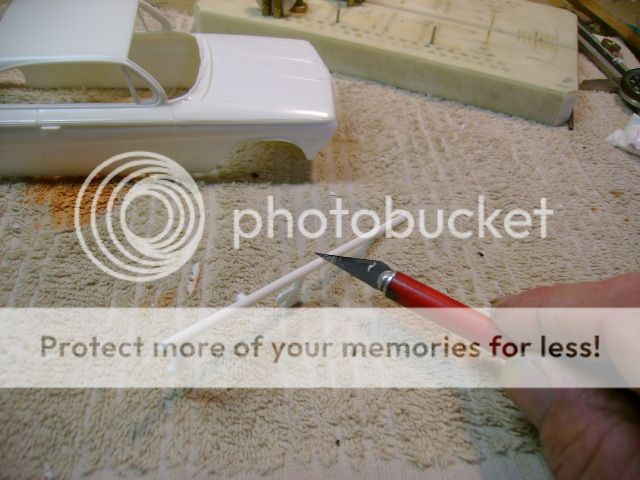 Next heat the spruce with a match, candle or lighter just until it sags... 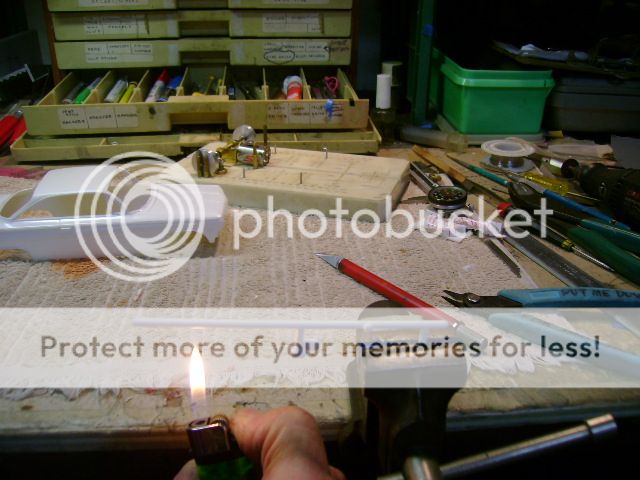 ...then stretch it out and hold until it cools. Depending on how much and how long heat is applied effects how much you can stretch the plastic, so you may have to experiment and practice until you acheive the desired diameter/length... 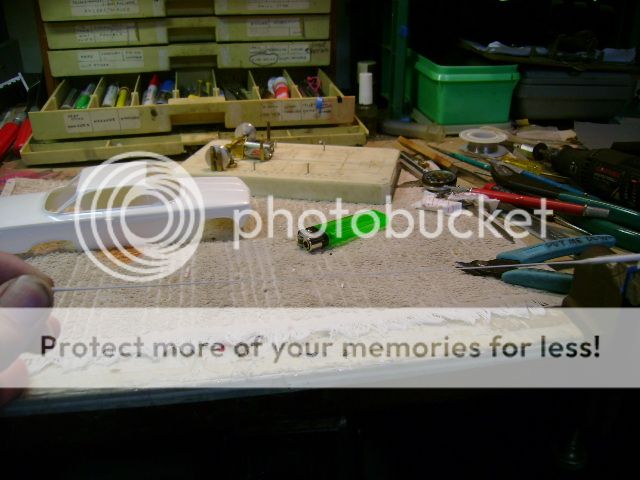 Using this method, you can make parts or shims as large as the tree itself...  ...or as small as .012"... 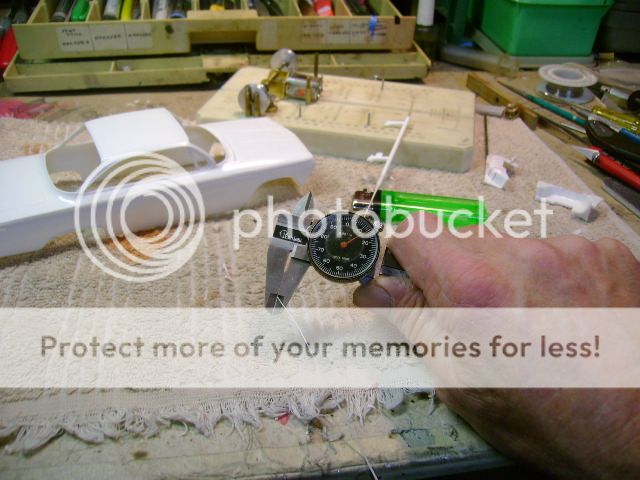 |
|
|
|
Post by brucewayne on Apr 29, 2013 17:04:46 GMT -8
For best results, bevel or chamfer the hood all around before mounting so when it's glued on you can easily recover the proper gaps Note: This basic step is important to maintain an even looking hood to fender gap as the better the fit now the better the glue up will be, no matter which type of glue you choose... 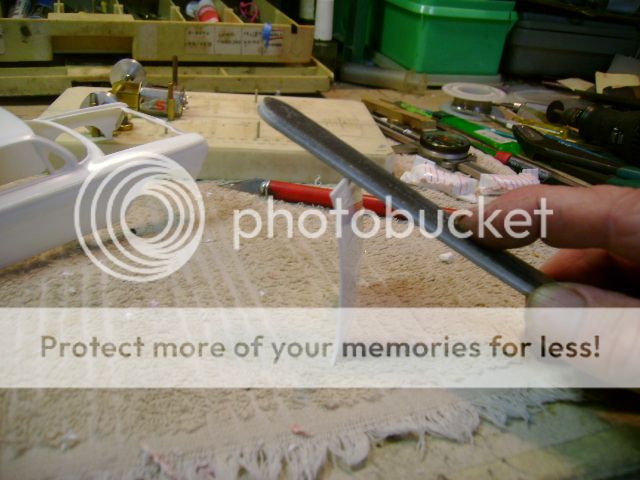 ...also sand the hood... 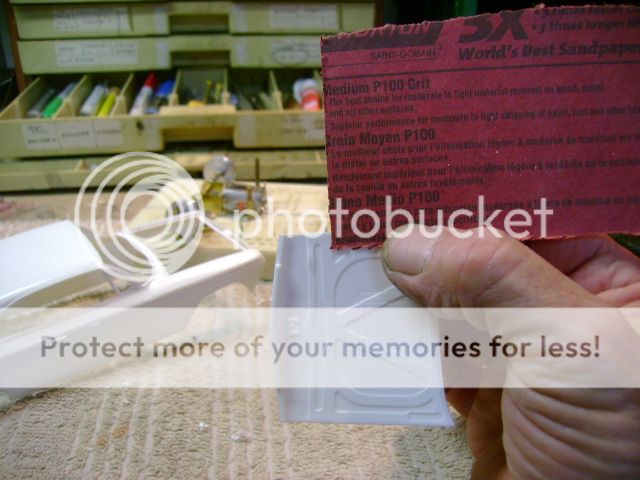 ...and the body about 1/4" back with 100 grit paper to ensure a good bond for the epoxy to come later... 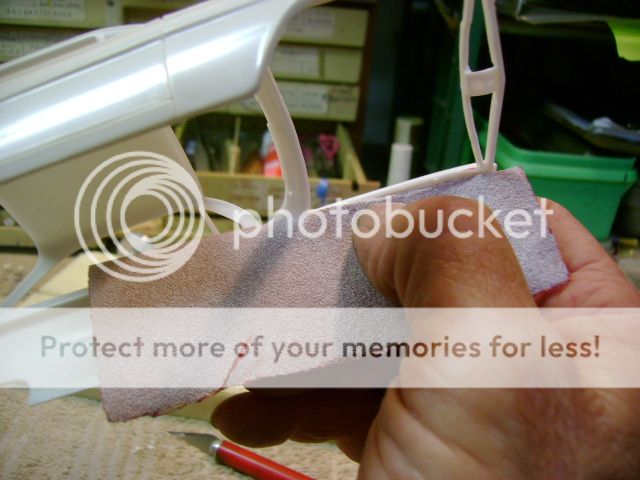 To glue it in place, first I've dry fitted a 1/2" piece of ~.012" shim under the rear center of the hood to raise it flush, then touched the seam with a brush loaded with liquid model glue to bond the two... 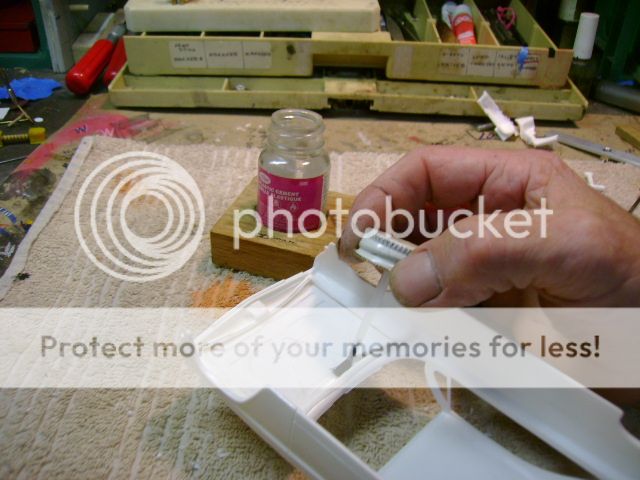 With the hood tacked on, I placed a few strips of masking tape to hold it in place... 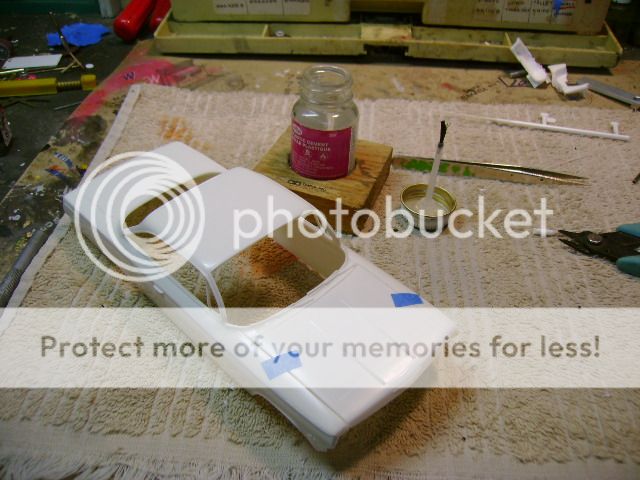 I raised up each corner of the hood by sticking the tapered end of the stretched sprue into the corner then tacked it as before with liquid glue... 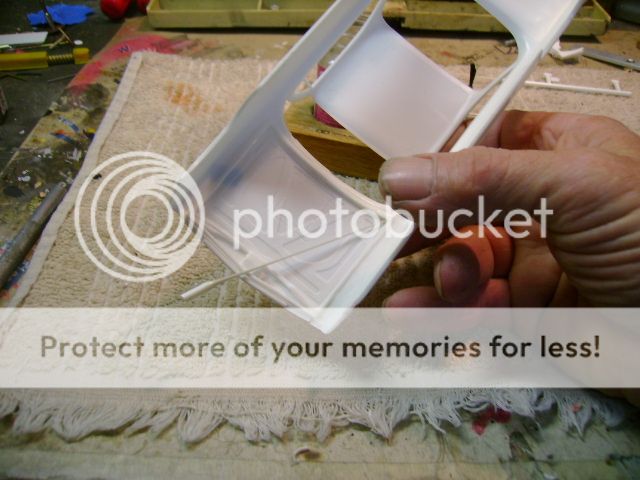 Once you are satisfied with the fit, you can tape it down to hold it then move on to the next corner... 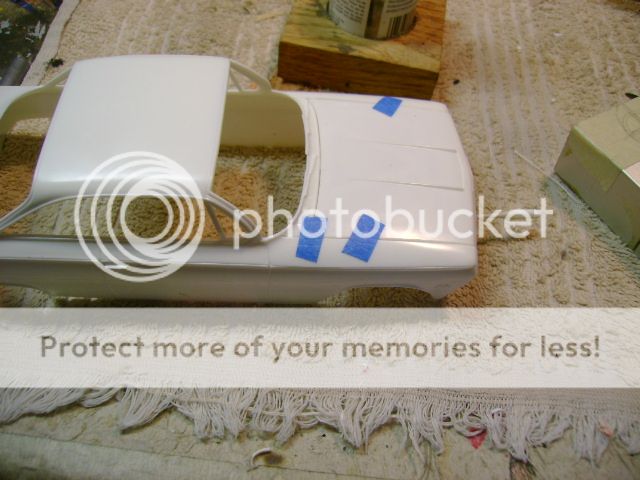 Repeat as necessary at all four corners, then tape it up to prevent shifting. This method resulted in a mostly even gap all around the hood. The fact that it is spaced up a little is desirable too for our next step which is to reinforce the joint with epoxy, as it allows the epoxy to seep into all the joints evenly, which it readily does by natural action. Note: it is very important to use a slow curing epoxy with 30 minutes working time or more. 5 minute epoxy cures too fast and will not creep as desired... 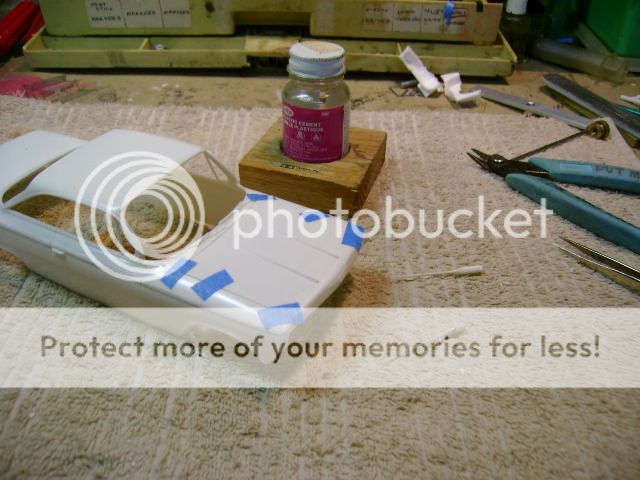 NOTE: Do not place tape on the hood until after you have glued the seam. If you tape the hood closed and apply liquid cement, there is a good chance the glue will creep along the tape and onto the outside of the model, thus melting the plastic and leaving a big gooey mess. Ask me how I know haha! |
|
|
|
Post by brucewayne on Apr 29, 2013 17:40:43 GMT -8
Let the liquid model cement dry at least two hours, or overnight if you can. Once it's cured and firm, mix up some 30 minute epoxy. I use a steel putty knife as a palette and a sharpened wooden stir stick to mix and apply... 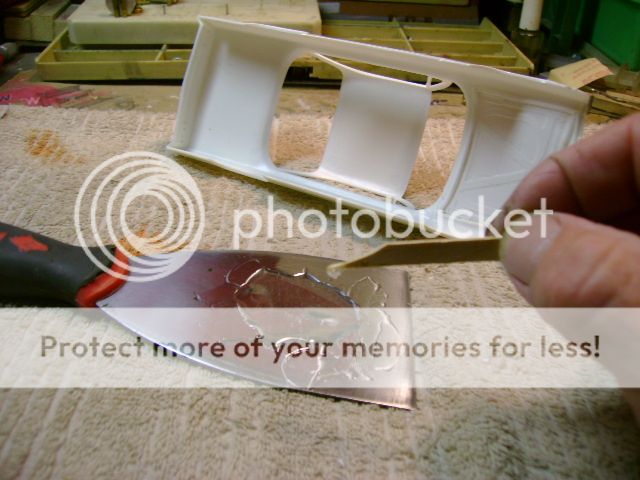 Pick up a big blob of epoxy and lay down about a 3/8" to 1/2" bead at a time to the seam until you have gone all the way around... 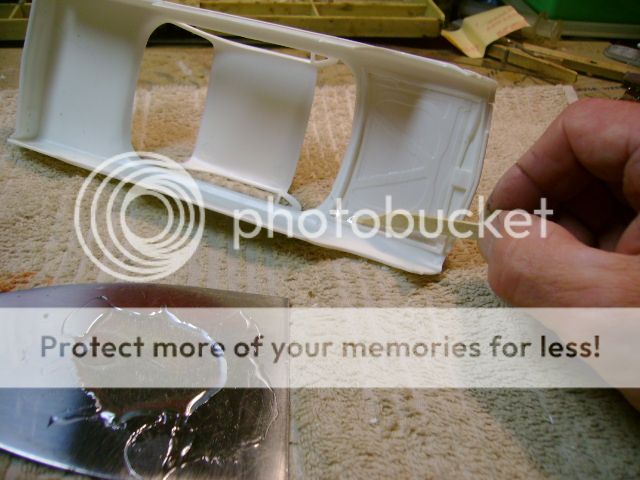 The beauty of the 30 minuite epoxy is that it will creep into all the seams and gaps making the assembly into a strong, one piece unit. By nature it will also leave a slight depression along the body gaps simulating the natural body seams. Done well, little work is left to finish and smooth out the hood line...  Once the epoxy has cured, you can go back over the seams with a saw to deepen and straighten the hood gaps... 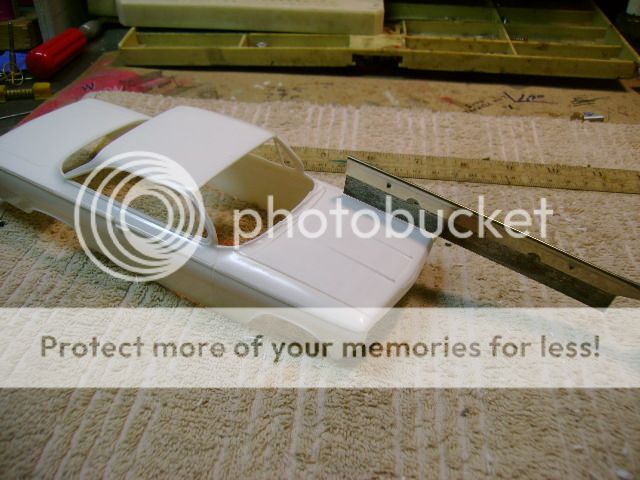 |
|
rogeru
Junior Member

Posts: 88
|
Post by rogeru on Apr 29, 2013 19:33:20 GMT -8
Thanks for the helpful information, Bruce.
When heating the sprue do you hold the heat in one place under it or do you move the heat back and forth along the length of the sprue?
Hope you can demonstrate how to attach the windshield and rear window securely to the body, if you have the chance. Thank you very much.
|
|
|
|
Post by brucewayne on Apr 30, 2013 7:30:38 GMT -8
You're Welcome Roger, I'm glad you found it helpful.
As for heating the sprue, you only need to heat about 1/2" of the sprue, and I ususally rotate it while heating for even melting. In the example above, I only applied heat for about 5 seconds because I needed the part to remain rather thick. You can vary the heat to obtain a shorter or longer "pull". Again, there is plenty pf material in your kit, so practice and experiment.
I hope to document some tips on gluing in the windows later on in this build, but the basic method is essentially the same as for the hood. Again Clear 30 minute epoxy is used for it's strength, but for it to bond well the plastic has to be sanded, so the window opening is roughed up with 100 grit about 1/4" all around the inside, the glass part is sanded all around it's periphery with a sanding stick being careful not to scratch the glass in an exposed area, tacking the part in with a few small drops of Super Glue in the corners, then laying a heavy bead of epoxy all around from the inside. Be sure to turn the model upside down and leave it alone for 12 hours before touching. This allows gravity to carry the epoxy into all the gaps and voids leaving the window securely bonded to the body. Hope this will help for now.
|
|
|
|
Post by Keith Tanaka on Apr 30, 2013 10:01:36 GMT -8
Bruce, thanks very much for your step by step tutorial. For most of us racers we need all the help we can get to make better cars. What brand styrene glue did you use for the tutorial and what brand is the 30 minute glue? Thanks again, Keith  |
|
|
|
Post by brucewayne on Apr 30, 2013 15:51:47 GMT -8
Keith, I use Testor's liquid cement in the jar. Note I took a block of wood, drilled a hole half way through and glued the bottle into the bottom to keep it from tipping over (I hate when that happens!). Whenever I run out I just get a new jar and re-fill this one... 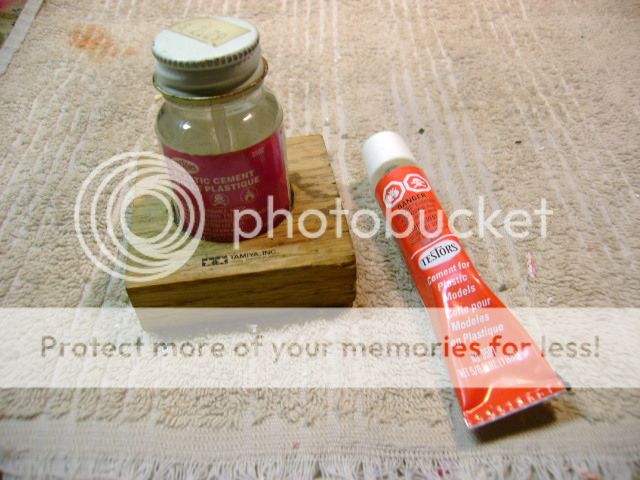 I had to shop around the last time I ran out of epoxy because everywhere I went all they had was the 5 minute variety. I don't think the brand is so important, they all seem to work the same. What is more important is that it is labeled "Clear" and "30 minute cure". When I did find some, it happened to be Devcon... 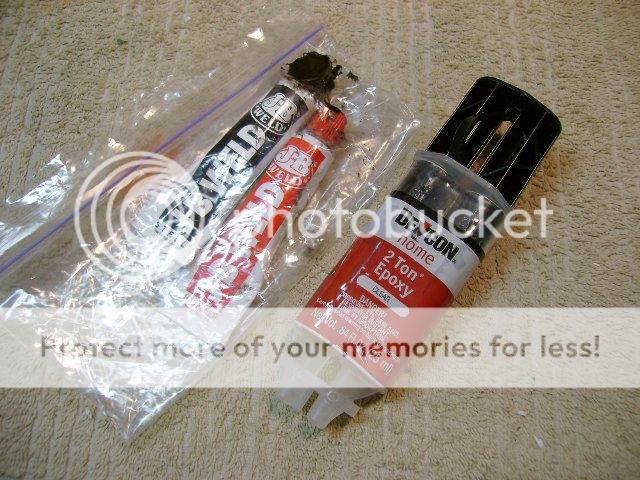 |
|
|
|
Post by brucewayne on May 1, 2013 15:37:06 GMT -8
Here is an example of a popular model with an opening hood but there is no flange to help glue it shut. Every model kit is a little different, but hopefully the tips and techniques shown can be adapted for your purposes... 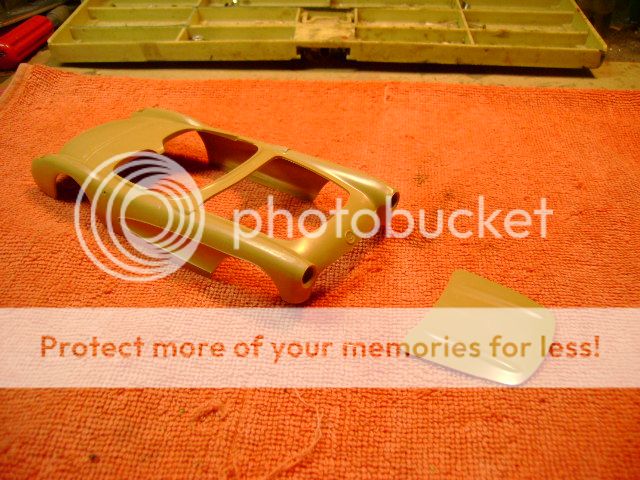 It is still important to bevel the edges of the hood panel... 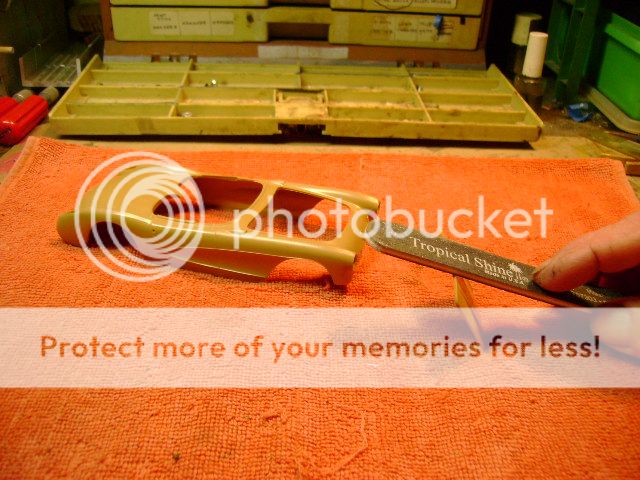 ...and the opening in the body... 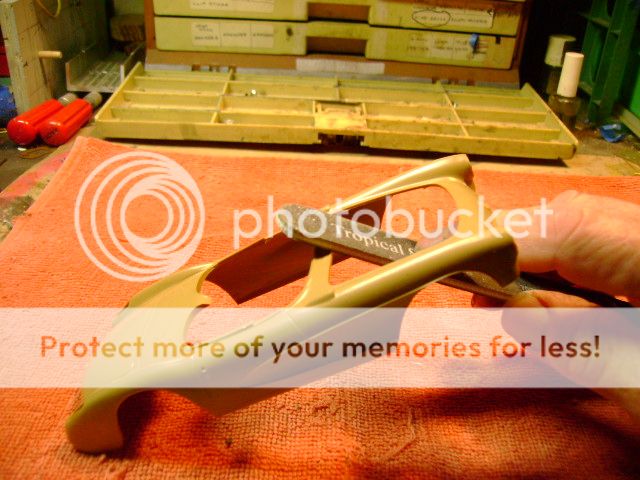 As before, sand back the marked areas on the hood and body with 100 grit paper to in preparation for the epoxy... 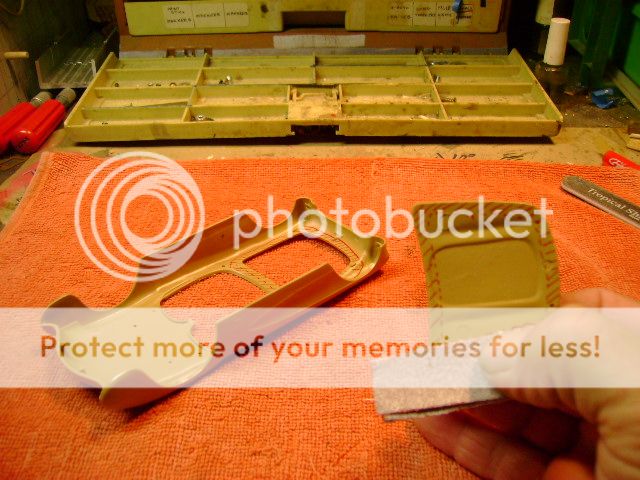 ...and you should end up with something like this. Note: Folding up your sandpaper into a little square helps you control where you sand... 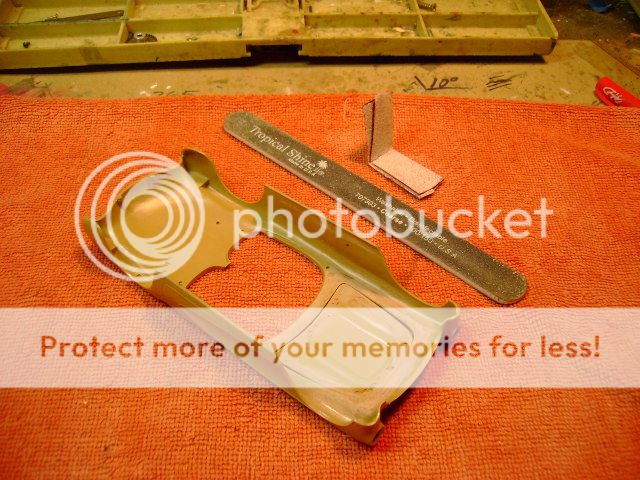 |
|
|
|
Post by brucewayne on May 1, 2013 16:30:01 GMT -8
You can make your own flanges from Evergreen styrene plastic sold in better hobby shops. It comes in various shapes and sizes of strips, but I prefer it in bulk sheet form, as you can easily make any size you need. The sample package shown here came with one sheet each of .010", .020" and .040". Each package includes instructions and tips on cutting, painting and gluing. To make a 1/4" strip, mark your line then use a steel straight edge and a #11 Exacto knife turned backwards to scribe the plastic about half way through, or in this case using .020" sheet about three strokes. You don't need to go all the way through, a light line will suffice...  Bend the plastic over and it will snap off right on at the line... 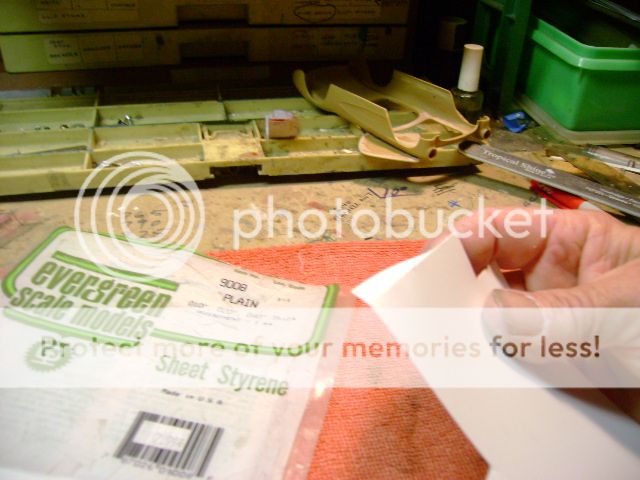 You can glue those strips to the body to form a ledge for the hood to rest on, but I have recently began using a much simplified method. I have found it is adequate to use a paper hole punch to make small dots out of .020" sheet to use as hood mounts... 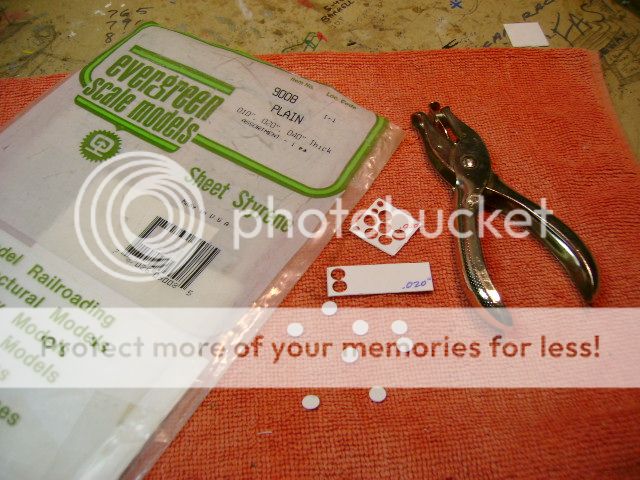 Next they get glued them to body. I held the body up and eyeballed their locations in a few strategic areas. Accuracy and symmetry are not too important here unless you suffer from OCD ;D Since I only have two little clips to use as clamps and four dots to add, to speed up the process I have used Super glue to mount them instead of plastic glue. It's makes a fine substitute as long as you follow a few basic rules. With Super glue, less is better. You only need a tiny drop on each dot to secure it, then use a knife or toothpick to run along the seam to help direct the glue where you need it to go, and if you apply too much quickly wick up the excess with the corner of a towel or tissue. Clamping them in place 30 seconds did the trick here... 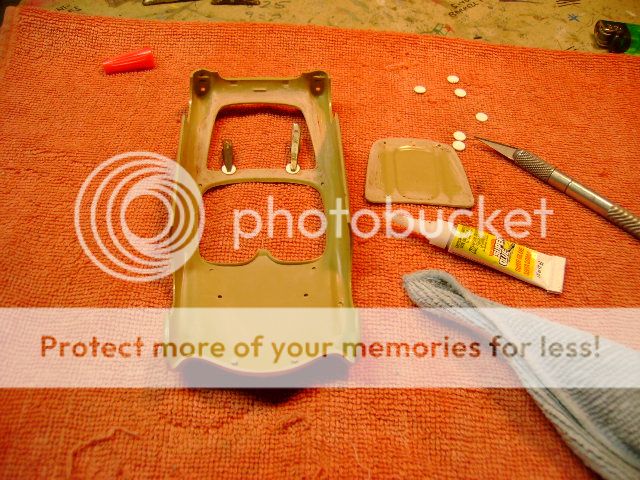 In total I added four dots to this example. With the hood dry fitted, I felt that would be sufficient. As mentioned, all kits are different so add them where you think they will be best on your particular project... 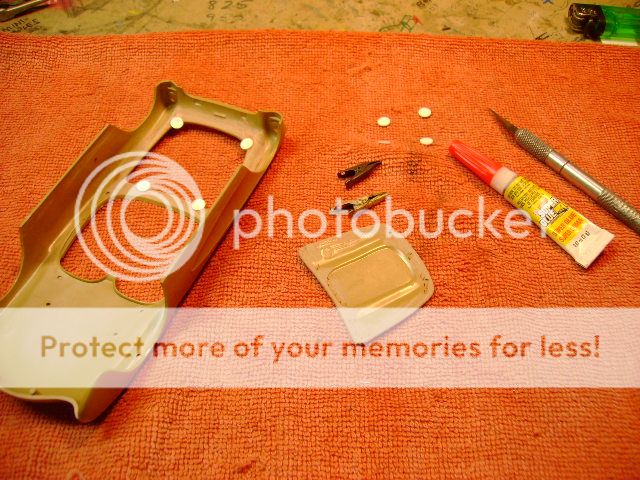 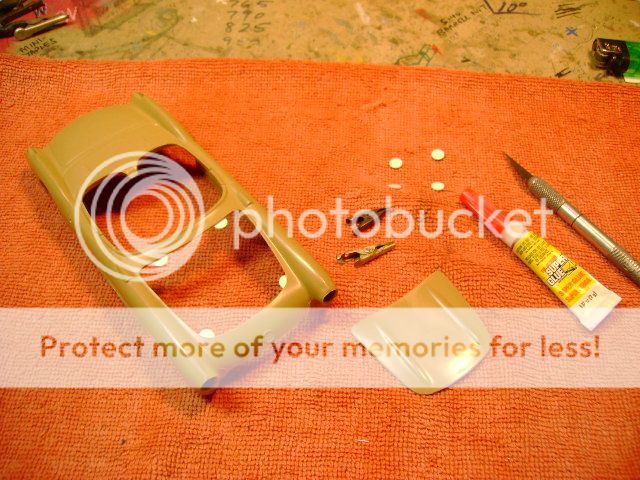 If you used model glue to bond them to the body, let it sit overnight in order to let them dry and cure fully before you mount the hood. Since I used Super glue (CA for short), I could go right to gluing the hood on. What is nice now with them dry and secured to the body is that you can now glue the hood to the dots with regular model glue and take your time aligning it. I tacked the hood down and was able to move it around until it was centered with equal gaps all around in the opening... 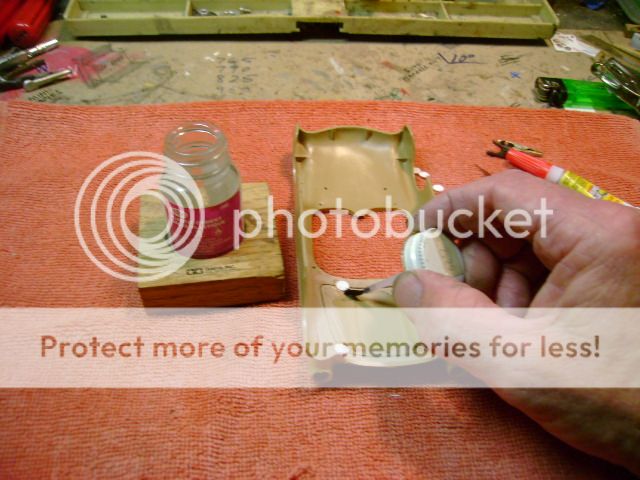 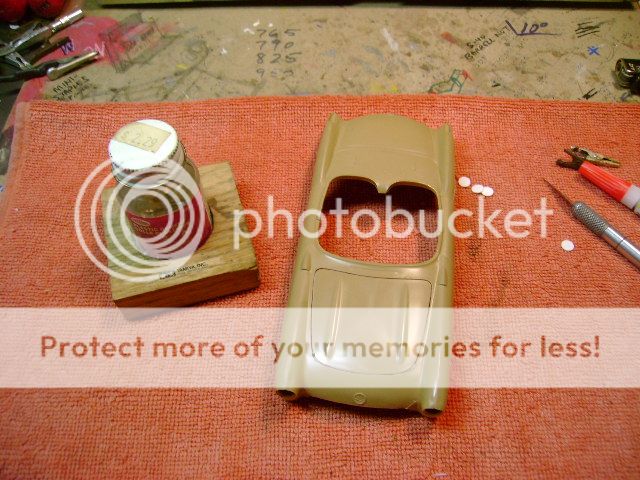 Once the assembly is dry, it's a good idea to go over the dots and seam again to rough up the areas. With the body prepped, you can now glue it up with epoxy the same as above... 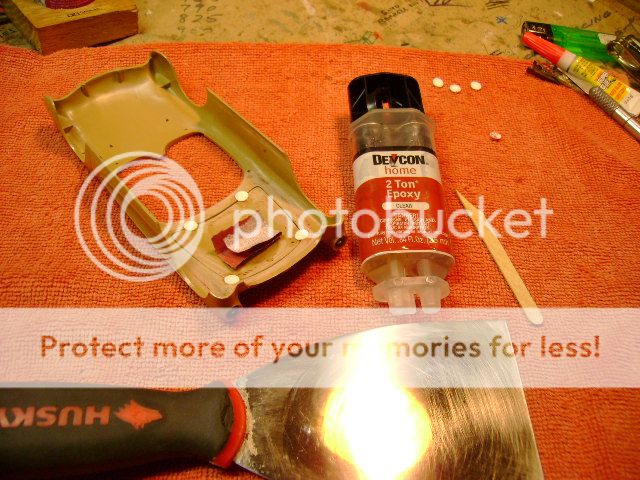 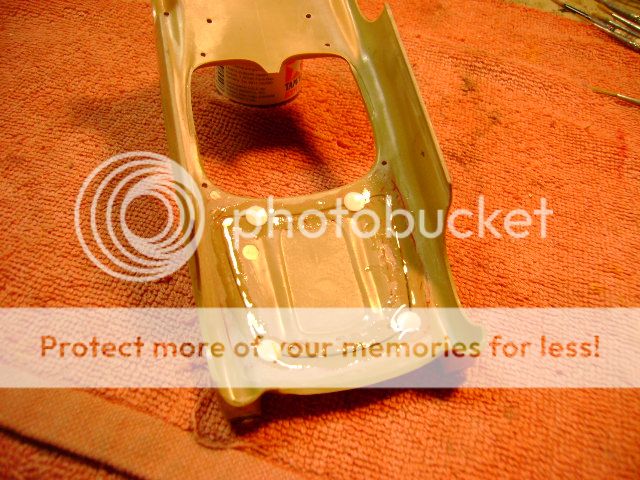 |
|
|
|
Post by brucewayne on May 1, 2013 16:59:17 GMT -8
Okay Roger, even though the model is not ready, I'm going to skip ahead and show some details of window mounting. As before, scribing the window at the tab before you break it off is a good idea... 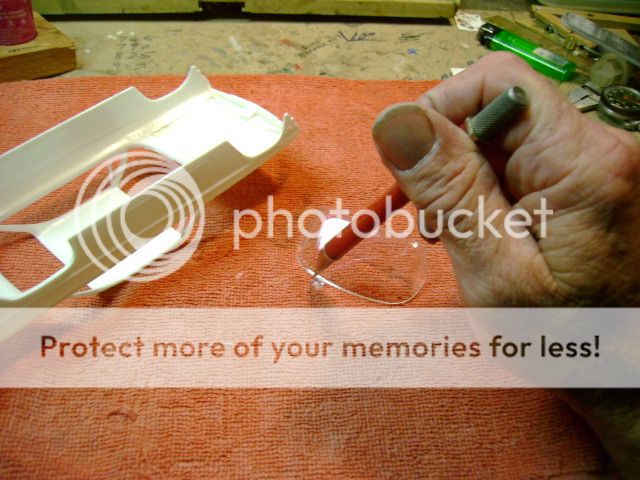 Next, dry fit the glass to thge body to identify where it contacts. I've marked the area under the glass with red, and marked an additional 1/8" all around where you also want to sand in blue... 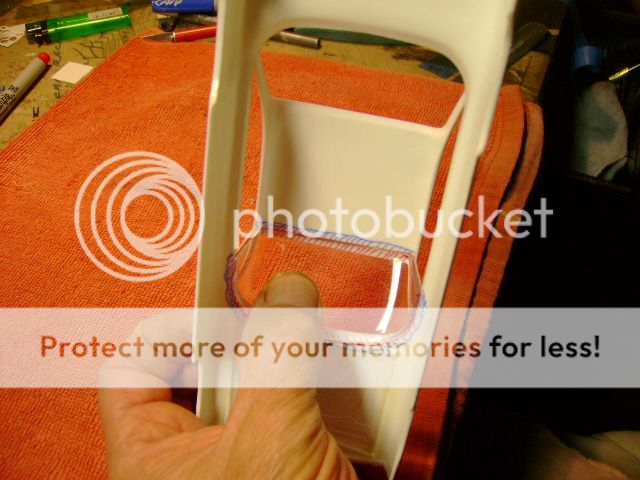 Sand the edges of the glass where it will contact the body. I use a sanding stick here for better control. If you fear you may scratch the glass while sanding, tape up the area to be protected first and leave the area to be sanded unprotected... 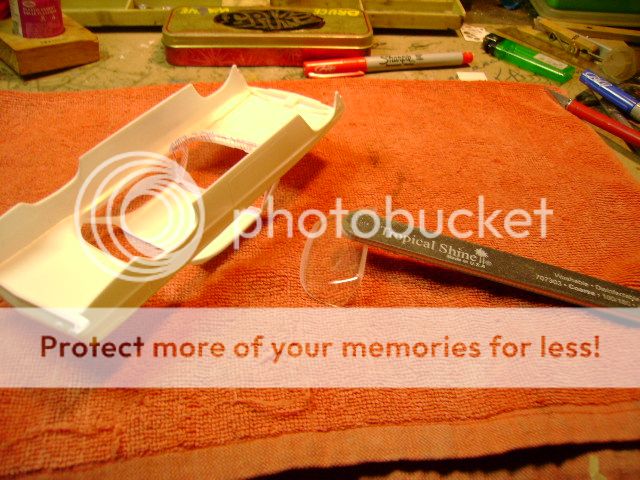 Also as before, using 100 grit paper folded up into a small square sand the body well on the inside where you made your marks. With all areas to be glue bonded ready, fit the glass and loosely tape it in place. You can simply clamp the window in or tape it. I've even used rubber bands and spacers to hold the window in until glue up, again each model project is different. If you choose to use a CA glue, just put a tiny drop in each corner or at a few other points of good contact just to tack it in. As long as you don't flood the joints with CA, you should not have any issues with fogging or crazing... 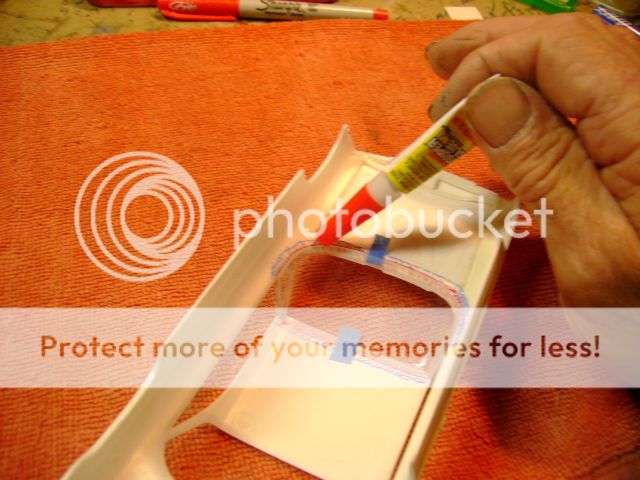 Once the window is tacked in, remove the tape and then follow the above steps for blobbing on the epoxy. Once you have a good bead laid all around the inside, turn the body upside down so the epoxy will seep into all the gaps and voids and let it cure overnight. Once dry, the window is now a one piece structural part of the body as in this sample... 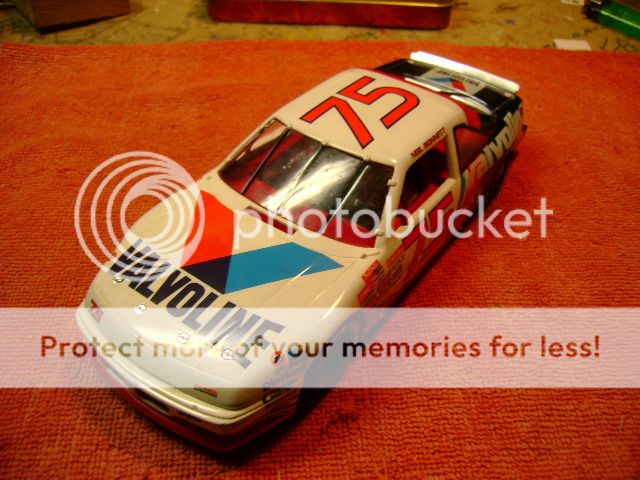 |
|
|
|
Post by craigg on May 1, 2013 17:46:05 GMT -8
Bruce, you should try Shoe Goo (found at most R/C hobby shops) for body reinforcement. It's stronger than epoxy, stays flexible, and sticks to the plastic like crazy. Too messy for windshields though.
|
|
|
|
Post by brucewayne on May 3, 2013 7:39:17 GMT -8
Thanks for the tip Craig. I'm always open to new adhesives, been wanting to try it out but that stuff is a little pricy. Had to pass on it the last time at the store due to budget constraints!  One big advantage of using epoxy on the hood is that it seeps into seams and fills the gaps with a smooth filet. For example the hood on this Pontiac kit was molded open, but for our purposes it was glued closed using the methods above. Note how the epoxy flowed into the gaps producing a seam that looks like it was molded closed. The epoxy fills the gap on it's own with no extra effort, and it sands and finishes just like the plastic in the kit... This rough sketch shows the action of epoxy as it flows out into the seam between the body, hood, and/or glass and serves to illustrate why it's important to sand both the glass and body well in these areas before glue up. By simply applying a bead to the inside joint, it will creep into the cracks and crevasses thus encapsulating the glass. Since it only adheres to the surface, it will bond best to roughened plastic. Once cured, the glass is now strong enough to be structural. 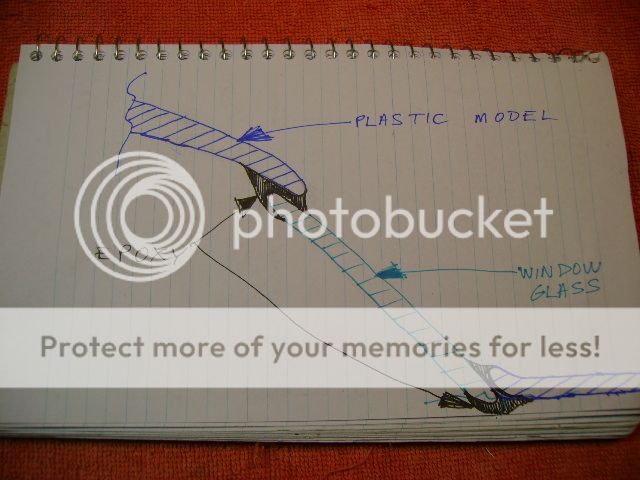 |
|
|
|
Post by brucewayne on Jun 4, 2013 16:59:26 GMT -8
With the hood securely bonded to the model, we can now move on to widening the body and flattening the sides. Depending on your chosen model subject, you may want to perform one or both in order to take full advantage of what the rules allow as to maximum width. This process will distort the body to some degree, and that is why it's necessary to have all the parts that were loose to be glued on first. This applies to any opening part, including hoods, doors, and on some late model NASCAR bodies front or rear bumper/valences as well. If you wait until after, they may not fit! This is my standard block of wood I use a starting point. It is three pieces of furring strips glued together to form a buck. Additional shims such as these cut up paint stir sticks are used as needed to increase it's width/capacity...  Since there will always be some "spring back", if you need the finished body to be 2 7/8" wide, then you would want to use a 3"+ block of wood as a widening buck. On some bodies, I've even shimmed out to 3 1/4" to get them wide enough yet be relaxed on the finished chassis... 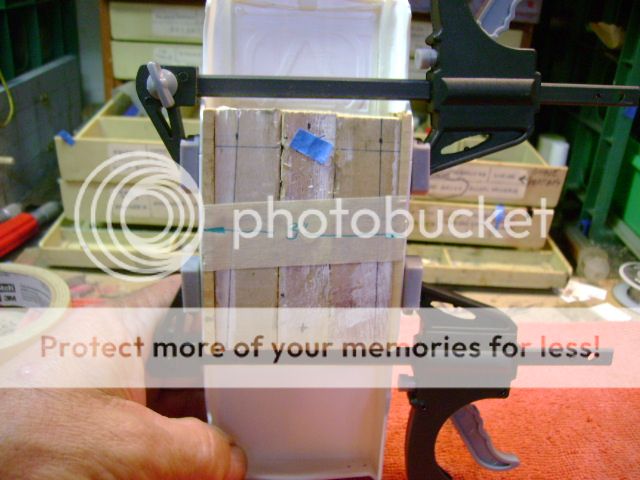 These cool mini clamps came from Harbor Freight and were only a buck each! Should've bought a dozen, you can never have too many LOL!. Anyway, by placing their feet flat against the sides, it will serve to flatten the body and ultimately allow a wider chassis to be built...  Since the model is formed from hot plastic injected into a mold and allowed to cool to that shape, it will resist most attempts to re-form it cold. So, once you have your body buck installed and clamped tightly, you may find it necessary to use some form of heat in order to give the plastic a new memory. I have taken clamped up bodies and submersed them waste deep in boiling hot water for 10-15 seconds, and also used a hair dryer on high directed towards the sides of the body to soften the plastic. Jim Watterson say's he puts his on the hat shelf of his car for a few sunny/hot days. Your choice here, you may have to experiment to find the method and results that suit you. I once tried the Toaster oven on 200 degrees, not recommended unless you want a blob of melted plastic!  |
|
timneja
Full Member
 Love racing these hard body cars!! The new knee is working better--so I'll be back soon!!
Posts: 191
|
Post by timneja on Feb 28, 2014 16:44:11 GMT -8
I use a hobby heat gun for "flexing" the body sides!! If you're careful-- it can be done in just a few minutes!! Using your block method Bruce would make it easy to keep the shape as it cools off!! Good tips man--- I'm always learning from you modeling types!!
|
|


